Introduction:
Enhancing your eyes with eyeshadow is a creative and expressive way to elevate your makeup game. However, achieving a flawless eye shadow application can be a challenge, especially for beginners. In this comprehensive guide, we will break down the essentials of eyeshadow application, from understanding different finishes and textures to exploring various techniques and color combinations. With step-by-step instructions and expert tips, you’ll learn how to create stunning eye looks that complement your unique features and style.
Part 1: Understanding Eyeshadow Finishes and Textures
Level 1: Matte, Shimmer, and Metallic Finishes
Eyeshadows come in different finishes, each offering a distinct look. Matte finishes are flat and lack any shimmer, making them ideal for creating depth and defining the crease. Shimmer finishes contain subtle sparkle, adding dimension and brightness to the lids. Metallic finishes, on the other hand, have a high-shine reflective quality, lending a bold and glamorous touch to any eye look.
Level 2: Powder, Cream, and Liquid Textures
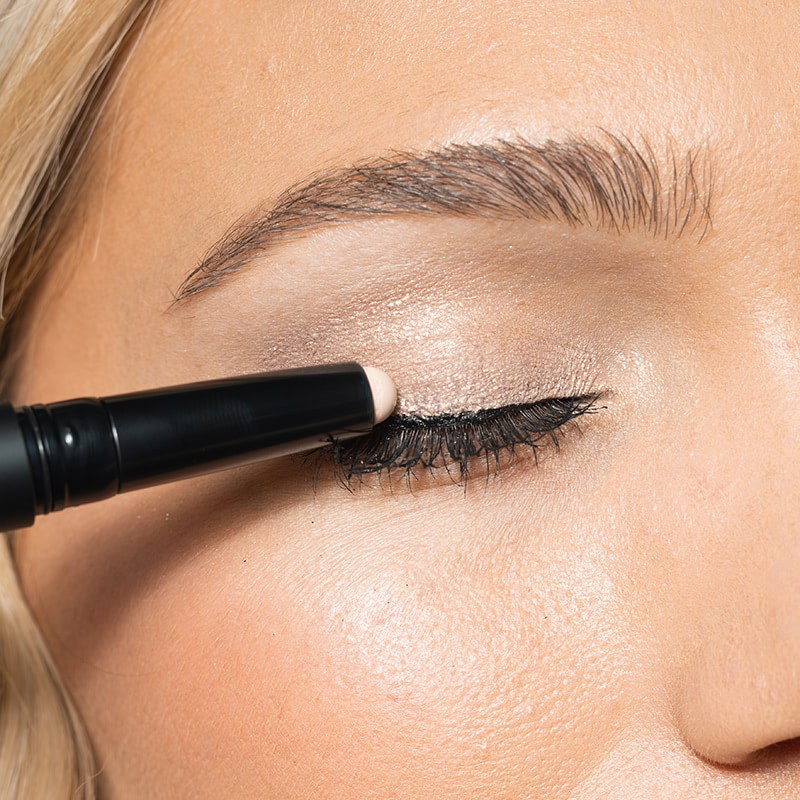
Eyeshadows also come in varying textures. Powder eyeshadows are the most common, known for their ease of blending and buildable coverage. Cream eyeshadows offer a smooth and creamy consistency, providing intense pigmentation and long-lasting wear. Liquid eyeshadows, typically in the form of pigmented liquids or creamy pen-style applicators, offer precision and can create stunning metallic and glossy effects.
Part 2: Essential Tools for Eyeshadow Application
Level 1: Eyeshadow Brushes
Investing in quality eyeshadow brushes is key to achieving a seamless and precise eye look. Basic brushes to consider include a fluffy blending brush for creating soft transitions and diffusing color, a flat eyeshadow brush for packing color onto the lid, and a small tapered brush for precise application in the crease and outer corners. These brushes will be your go-to tools for most eyeshadow looks.
Level 2: Additional Tools
Other handy tools for eyeshadow application include a smudger brush or sponge-tipped applicator for precise color placement along the lash line or lower lash line. A densely packed brush or your finger can be used for applying shimmer or metallic shades to achieve maximum impact.
Part 3: Prepping the Eyelids for Eyeshadow Application
Level 1: Cleansing and Moisturizing
Before applying eyeshadow, ensure your eyelids are clean and properly moisturized. Remove any excess oil or makeup residue with a gentle cleanser, then follow with a lightweight eye cream to hydrate and prime the area. This step provides a smooth canvas for eyeshadow application and helps prevent creasing.
Level 2: Eyeshadow Primer
Using an eyeshadow primer can create a base that enhances color vibrancy, extends wear time, and prevents creasing or fading. Apply a small amount of primer to your lids and blend it in evenly using your finger or a brush. Give it a few seconds to set before proceeding with eyeshadow application.
Part 4: Eyeshadow Application Techniques
Level 1: Basic Eyeshadow Application
Start with a transition shade, a color that closely matches your skin tone or is slightly darker, and apply it above the crease. This shade helps create a seamless transition between the eyeshadow and the brow bone. Next, apply a slightly deeper shade to the crease using a windshield wiper motion. Finally, pack a shimmer or metallic shade onto the lid using a flat eyeshadow brush, concentrating the color on the center and inner corners of the lid.
Level 2: Advanced Eyeshadow Techniques
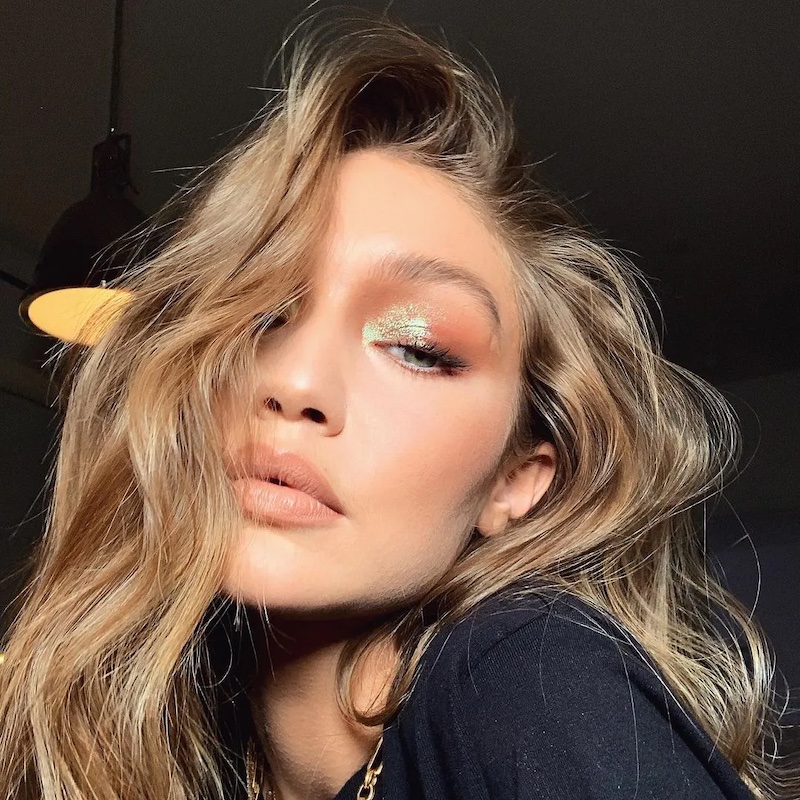
To elevate your eyeshadow game, experiment with more advanced techniques like cut crease, halo, or smokey eyes. Cut crease involves using a lighter shade to define the crease, creating a distinct line between the crease and the lid. Halo eye makeup involves placing darker shades on the inner and outer corners of the lid, leaving the center area lighter and brighter. Smokey eye makeup involves blending multiple eyeshadow shades seamlessly to create a sultry and smoldering effect.
Part 5: Eyeshadow Color Combinations and Enhancements
Level 1: Complementary Colors
Understanding color theory can help you create eye-catching eye looks. Complementary colors, such as purple and yellow, blue and orange, or green and red, when paired together, create a striking contrast that makes the eyes pop. Experiment with different combinations to find the ones that best complement your eye color.
Level 2: Adding Depth and Dimension
To give your eyeshadow look more depth and dimension, consider incorporating darker shades in the outer corners and crease. This technique adds definition and creates a more dramatic effect. Additionally, using a light shimmer shade or highlighting the inner corners of the eyes can brighten and open up the eye area.
Part 6: Eyeshadow Tips and Tricks
Level 1: Blending Like a Pro
Blending is the key to achieving a seamless and natural-looking eyeshadow application. Use a fluffy blending brush and take your time to blend out the edges of each shade, gradually building up intensity. A light hand and a circular motion can help create a natural gradient effect.
Level 2: Fixing Mistakes
Mistakes happen, but there are ways to fix them. If you applied too much eyeshadow or went over the crease, use a clean brush and blend out the excess. A cotton swab dipped in micellar water can also be used to clean up any smudges or fallout under the eyes or on the cheeks.
Part 7: Enhancing the Eyeshadow Look
Level 1: False Lashes
False lashes can take your eye makeup to the next level. Apply false lashes after applying eyeshadow and eyeliner, but before mascara. Start by trimming the lashes to fit your eye shape, then apply a thin layer of lash glue along the strip. Let the glue dry for a few seconds before placing the lashes on the lash line, using tweezers if necessary. Once the lashes are in place, use mascara to blend your natural lashes with the falsies.
Level 2: Tightlining and Waterline
Using eyeliner to tightline or apply color to the waterline can make a significant difference in defining the eyes. Tightlining refers to applying eyeliner to the upper lash line, creating the illusion of fuller lashes. Applying eyeliner to the waterline can make the eyes appear larger, but be sure to use a waterproof or long-wearing formula to prevent smudging.
Part 8: Removing Eyeshadow
Level 1: Removing Eye Makeup
Properly removing eyeshadow, particularly waterproof formulas, is essential to maintaining healthy and clear eyes. Use a gentle eye makeup remover or micellar water and a cotton pad to wipe away eyeshadow, eyeliner, and mascara. Start at the outer corner of the eye, moving inward, and avoid rubbing or pulling at the delicate skin around the eyes.
Level 2: Taking Care of the Eye Area
After removing eye makeup, apply a hydrating eye cream to nourish and soothe the area. Regularly moisturizing the eye area can help prevent dryness, fine lines, and wrinkles. Be gentle when applying and avoid pulling or tugging on the skin.

Conclusion:
Mastering the art of eyeshadow application requires knowledge, practice, and creativity. By understanding different finishes and textures, investing in quality tools, properly prepping the eyelids, and learning various application techniques and color combinations, you can create stunning eye looks that enhance your natural beauty. Remember, practice makes perfect, so take the time to experiment, have fun, and let your creativity shine through your eyeshadow creations.
Eyeshadow application can be a fun and creative way to enhance your natural beauty and express yourself. By understanding the different finishes and textures of eyeshadows, investing in quality tools, prepping the eyelids, and learning various application techniques and color combinations, you can achieve a flawless and personalized look. Don’t forget to use our tips and tricks for blending, fixing mistakes, and enhancing your eye makeup look with false lashes and eyeliner. And always remember to take care of your eyes and the surrounding skin by practicing proper removal and moisturizing. With practice and patience, you’ll be a pro at eye shadow application in no time.