Eco-Friendly 3-Ingredient Goat Milk Soap DIY

Introduction to Goat Milk Soap

Goat milk soap has become increasingly popular for its natural, beneficial properties. Known for creating a luxurious lather, goat milk adds creaminess and nourishment to soaps, offering a gentle yet effective cleansing experience. Ideal for those with sensitive skin, it provides moisture without stripping the skin’s natural oils.

The use of goat milk in soap making is not new. This traditional ingredient has been valued for centuries for its rich content of fatty acids, vitamins, and minerals. Goat milk’s high fat content contributes to the production of a soap that’s exceptionally moisturizing and beneficial to the skin. It contains lactic acid which aids in gently removing dead skin cells, making your skin look smooth and youthful.

Making goat milk soap at home can be a satisfying DIY project. With just three key ingredients you can create a batch of eco-friendly soap that’s kind to your skin and the environment. This blog post serves as a guide for beginners and soap-making enthusiasts alike, outlining the simple steps to craft your very own goat milk soap. We’ll cover everything from the benefits and supplies needed, to the mixing, pouring, curing, and even troubleshooting common issues.

Whether you’re looking for a sustainable skincare option or a new craft to master, making goat milk soap is a rewarding venture. Stay tuned as we delve into the rewarding process of turning these natural ingredients into a batch of your very own homemade soap.

Easy Goat Milk Soap Recipe

Benefits of Using Goat Milk in Soap

The benefits of using goat milk in soap are extensive, especially for those seeking natural skincare solutions. Here are some key advantages:

  1. Moisturizing Properties: Goat milk is rich in fatty acids and cholesterol, which are major components in moisturizing the skin. This makes goat milk-based soaps particularly beneficial for dry and sensitive skin types.
  2. Gentle Cleansing: Unlike many commercial soaps, goat milk soap does not strip the skin of its natural oils. The creaminess of the milk produces a gentle lather that removes impurities without irritation.
  3. Rich in Nutrients: Loaded with essential vitamins and minerals such as Vitamin A, B1, B6, B12, C, D, and E, as well as zinc, copper, iron, and selenium, goat milk nourishes the skin, promoting a healthy glow.
  4. Natural Exfoliation: Lactic acid, naturally present in goat milk, helps to remove dead skin cells, unclogging pores and improving the skin’s texture and appearance.
  5. Soothing for Skin Conditions: For individuals suffering from eczema, psoriasis, or acne, goat milk soap can provide soothing relief due to its anti-inflammatory properties.
  6. Supports the Skin’s Natural Barrier: The nutrients in goat milk support and enhance the skin’s natural barrier function, helping to retain moisture and protect against environmental damage.

Incorporating goat milk into soap results in a product that not only cleanses effectively but also offers various skincare benefits, making it an excellent choice for those looking for a multi-function, skin-friendly product.

Essential Supplies and Ingredients

To start your journey in making goat milk soap, you’ll need a few key supplies and ingredients. The essentials required are simple and easy to find, making this project accessible to anyone, whether you’re a beginner or an experienced soap maker.

  1. Goat Milk: This is the core ingredient; it provides your soap with its unique moisturizing and skin-nourishing properties.
  2. Lye (Sodium Hydroxide): Needed for the saponification process to turn fat and oils into soap and glycerin.
  3. Oils and Fats: Typically, a combination of coconut oil, olive oil, and possibly other fats like animal tallow or shea butter are used. These contribute to the soap’s texture and lather.
  4. Molds: You will need molds to shape your soap. Silicone molds work well because they are flexible and easy to use.
  5. Safety Gear: Lye can be caustic, so safety goggles, gloves, and long sleeves are a must during the soap making process.
  6. Immersion Blender: This tool helps to blend the oils and lye mixture efficiently, ensuring a smooth consistency.
  7. Thermometer: A thermometer is crucial to monitor the temperatures of your oils and lye mixture, aiming for them to be around 110-125 degrees Feng when mixed.
  8. Kitchen Scale: Precision is key in soap making, so a reliable kitchen scale is necessary to measure your ingredients accurately.

Gather these supplies and prepare your workspace, and you’re ready to proceed to the next steps of your soap making adventure!

Zum Frankincense & Myrrh Goat's Milk Soap Same

Preparing Your Goat Milk

Proper preparation of goat milk is crucial for successful soap making. Here’s how to prepare it:

  1. Measure Accurately: Use a digital kitchen scale to measure the goat milk. Precision ensures consistency in soap quality.
  2. Freeze the Milk: Pour the measured milk into an ice cube tray or a shallow dish. Freezing helps prevent scorching when mixed with lye.
  3. Thaw Carefully: Before using, thaw the goat milk cubes slightly. They should remain slushy to keep the reaction with lye cooler and controlled.
  4. Keep it Chilled: During soap making, keep the goat milk in a cold water bath. This method further helps in managing the temperature.

Following these steps will provide a stable base for your soap, maintaining the natural qualities of the goat milk throughout the saponification process.

Properly prepared goat milk enhances the soap’s moisturizing and nourishing properties, making each bar a luxurious skincare product.

The Soap Making Process

Once you’ve prepared your goat milk, you’re ready to start the soap making process. Here’s a step-by-step guide:

  1. Safety First: Wear protective gear—including gloves, goggles, and long sleeves—before handling lye.
  2. Lye Solution: Slowly add lye to the slushy goat milk, stirring gently until fully dissolved.
  3. Heat the Oils: Combine oils in a large pot and warm to the desired temperature.
  4. Mixing: Pour the lye mixture into the oils. Use an immersion blender to mix until it reaches trace – a pudding-like thickness.
  5. Add Extras: At this point, you can add optional ingredients like essential oils or dried herbs.
  6. Pour: Once at trace, quickly pour the soap batter into molds.
  7. Insulate: Cover the molds with plastic wrap and a towel to keep the heat in, ensuring proper saponification.
  8. Monitor: After 24 hours, check the soap. It should be firm enough to unmold.

Following these steps carefully will help you create a beautiful, moisturizing batch of goat milk soap. Be mindful to avoid rushing and remember that precision and patience are key to achieving the best results.

Pouring and Curing Your Goat Milk Soap Bars

After mixing your soap to the right consistency, it’s time to pour and cure your goat milk soap bars. Here’s how to do it step-by-step:

  1. Pour into Molds: Quickly pour the soap mixture into your prepared molds. Make sure to fill them evenly.
  2. Smooth the Tops: Use a spatula or the back of a spoon to smooth the surface of the soap in the molds.
  3. Cover and Insulate: After pouring, cover the molds with plastic wrap. Wrap them with a towel to insulate. This helps maintain the temperature needed during the initial saponification process.
  4. Curing: Let the soap set in the molds for at least 24 hours before removing. It will feel firm to the touch when ready.
  5. Unmolding: Once the soap is firm, gently remove it from the molds. This might require some patience and gentle maneuvering.
  6. Cutting: If you’ve used a large mold, cut the soap into bars of your desired size using a knife or soap cutter.
  7. Curing Bars: Place the cut bars in a cool, dry place to cure. They should cure for four to six weeks. During this time, water evaporates from the soap, which results in a harder, longer-lasting bar.

After pouring and during curing, keep your soap in an area away from direct sunlight and humidity to ensure optimal results. Checking the hardness and PH level of soap occasionally can also be beneficial for achieving the best quality.

your own goat milk soap

Troubleshooting Common Soap Making Issues

When diving into the world of homemade soaps, you may encounter a few hiccups along the way. It’s perfectly normal in the soap making process to face challenges, but don’t worry, most issues have simple solutions. Here are common problems you might face and how to troubleshoot them:

  1. Soap Doesn’t Reach Trace: If your mixture doesn’t thicken, it may need more mixing. Use your immersion blender in bursts until the desired thickness is achieved.
  2. Soap Separates After Pouring: This can happen if the soap batter wasn’t mixed well or the temperatures of your lye and oils were too different. Mix to a proper trace and make sure your ingredients are similar in temperature.
  3. Soap is Lye-Heavy: A sharp, chemical smell or a crumbly texture might indicate too much lye was used. Precision is crucial; always measure your lye accurately with a kitchen scale.
  4. Orange or Brown Spots (DOS): Dreaded orange spots can be caused by rancid oils or too much superfat. Check the freshness of your oils and follow recommended superfat percentages.
  5. Soap is Too Soft: This could be due to high water content or not enough hard oils like coconut oil. Make sure your recipe has a balanced mix of oils and consider reducing the water amount if necessary.
  6. Mixture Volcanoes During Saponification: This is typically a temperature issue. Keep your mixture cool by freezing your goat milk and adding lye gradually.
  7. White Ash on Top: Known as soda ash, this is caused by carbon dioxide in the air reacting with the lye. Spraying the top with isopropyl alcohol can prevent this.

Remember, soap making is an art that takes practice. Don’t be discouraged by these common issues; instead, use them as learning opportunities to perfect your craft. Happy soap making!

Customizing Your Goat Milk Soap

Customizing your homemade goat milk soap allows for creativity and personalization. Here’s how you can make your soap unique:

  1. Essential Oils: Infuse your soap with your preferred scents. Lavender, peppermint, or rosemary can add delightful fragrances.
  2. Natural Colorants: Use spices like turmeric or cinnamon, or botanicals like alfalfa powder, for color.
  3. Textures: Add oatmeal, poppy seeds, or coffee grounds for exfoliation.
  4. Shapes: Choose fun molds to set your soap apart, creating bars, rounds, or intricate patterns.
  5. Layers and Swirls: Create visual appeal with multiple layers or artistic swirls using a skewer or knife.

Experiment with these options after you’ve mastered the basic soap recipe. Remember, adding too much of any additive can affect the final soap, so start with small quantities. Enjoy designing a bar that’s as unique as you are!

Sustainable Practices in Soap Making

Embracing sustainability in soap making is both rewarding and responsible. Here are ways to ensure your goat milk soap is eco-friendly:

  1. Source Locally: Try to find goat milk from local farms to reduce carbon footprint.
  2. Organic Ingredients: Use organic oils and lye to minimize exposure to pesticides and chemicals.
  3. Minimal Packaging: Opt for reusable or biodegradable molds and packaging.
  4. Natural Additives: Choose herbs and colorants that are pure and earth-friendly.
  5. Energy Conservation: Use low-energy methods for melting oils and heating mixtures.
  6. Waste Reduction: Reuse or recycle leftover materials, and repurpose trimmed soap edges.
  7. Water Use: Be mindful of water consumption during cleanup by using less and recycling when possible.

Implementing these practices contributes to a healthier planet and adds value to your handcrafted soaps.

Final Thoughts and Soap Making Resources

As we wrap up this guide on crafting eco-friendly 3 ingredient goat milk soap, I hope you feel inspired to try this rewarding DIY project. Here are some final thoughts and resources to help you as you embark on your soap making journey:

  1. Be Patient: Soap making is a craft that often requires trial and error. Take your time to enjoy the process.
  2. Quality Matters: The quality of ingredients directly influences the soap’s character. Source the best goat milk, oils, and lye you can find.
  3. Experiment: Once you’re confident with the basics, don’t hesitate to experiment with scents, colors, and textures.
  4. Sustainability is Key: Remember the importance of using sustainable practices in your soap making to protect the environment.
  5. Resources: Look for local soap making workshops, join online communities, and gather valuable insights from established soap makers.
  6. Continued Learning: There are many books and online articles that offer advanced techniques and recipes for more complex soap making.

Creating your own goat milk soap can be a gratifying experience that yields results you can use every day. With these resources and the essential knowledge from this guide, your homemade soap will not only be good for your skin but also kind to the earth. Let your creativity flow and enjoy the satisfaction of using a bar of soap you made yourself!

Crafting Natural Soap with Breast Milk: A DIY Guide

Benefits of Using Breast Milk in Soap

Breast milk is a unique and valuable ingredient for soap-making. This natural wonder is packed with vitamins and nutrients that can significantly benefit the skin. Here are the key benefits of breastmilk soap recipe into your homemade soap:

  1. Rich in Fats: Breast milk has higher fat content than other milks. Fats contribute to a soap’s creaminess and moisturizing properties.
  2. Natural Sugars: These increase the lather of the soap, making for a luxurious bathing experience.
  3. Vitamins A, C, D, & E: These vitamins nourish and support healthy skin, possibly promoting healing and preventing dryness.
  4. Gentle on Sensitive Skin: With its mild composition, breast milk soap is ideal for babies, those with sensitive skin, or individuals suffering from skin conditions like eczema.
  5. Antibacterial Properties: Although it’s unclear how many of breast milk’s antibacterial components survive the soap-making process, any retained properties could offer additional skin health benefits.

By choosing to create soap with breast milk, you are making a product that is gentle, nourishing, and soothing, perfect for the whole family’s skin care needs.

Breast Milk Soap Recipe (Easy DIY) I Tweak & Tinker

Essential Equipment and Safety Precautions

When embarking on your journey into breast milk soap making, having the right equipment and taking necessary safety measures are crucial. Here is a list of essential items and precautions to ensure a safe and efficient soap-making process:

Equipment Needed for Breast Milk Soap Making

  1. Digital Scales: Ensure all your ingredients are measured accurately for the best results.
  2. Stainless Steel or Plastic Containers: For mixing ingredients without reacting with lye.
  3. Stick Blender: Helps in blending the soap mixture to the right consistency.
  4. Soap Mold: Shapes your soap as it sets and cures.
  5. Safety Gear: Goggles, gloves, and long sleeves to protect your skin and eyes from lye.
  6. Thermometer: Monitor the temperature of your lye solution and oils.
  7. PH Strips: Check the PH level of your soap to ensure it’s safe for skin use.

Safety Precautions

  1. Lye Safety: Handle lye with extreme care; it is a caustic substance that can burn skin on contact.
  2. Proper Ventilation: Work in a well-ventilated area to avoid inhaling any fumes from the lye.
  3. Avoid Distractions: Keep children and pets away from your work area to prevent accidents.
  4. Emergency Measures: Keep vinegar handy to neutralize any lye spills, and know your route to the nearest water source for flushing any contact areas.

By carefully selecting the right equipment and adhering to safety guidelines, you’ll ensure a successful and enjoyable soap-making experience. These steps not only prevent accidents but also guarantee that your breast milk soap retains its beneficial qualities, making it perfect for delicate skin.

Shea Baby Breast Milk Soap DIY Material Supplement Package

Choosing the Right Oils for Your Breastmilk Soap Recipe

Choosing the right oils is essential for making quality breast milk soap. Here’s what you need to consider:

  1. Olive Oil: Ideal for sensitive skin, olive oil provides mildness to the soap. It helps produce a stable lather and a harder bar.
  2. Coconut Oil: Known for its cleansing properties, coconut oil gives the soap excellent foaming and hardness. However, it can be drying, so it’s often balanced with other moisturizing oils.
  3. Castor Oil: This oil boosts lather. It is commonly used in small amounts in breastmilk soap recipe to enhance the soap’s ability to attract and retain moisture.
  4. Sunflower Oil: Rich in Vitamin E, sunflower oil is a conditioning agent that makes the soap more luxurious and creamy.
  5. Shea Butter: Often added for its moisturizing benefits, shea butter makes the soap creamy and nourishing, which is excellent for dry and sensitive skin.

When formulating your breastmilk soap recipe, consider the properties you desire in your final product. Do you need more lather, moisture, or hardness? Adjust the oil ratios based on these preferences to create the perfect bar of soap for your needs. Keep in mind the recommended usage rates and always run your final breastmilk soap recipe through a soap calculator to ensure lye safety and balance.

Preparing Breast Milk for Soap Making

To begin the soap making process, proper preparation of breast milk is essential. The key steps to prepare breast milk for soap making are as follows:

  1. Freeze the Milk: Pour fresh breast milk into an ice cube tray and freeze until solid. This prevents scorching when mixed with lye.
  2. Chill the Lye Solution: Create an ice bath and place your container with lye solution into it. This keeps temperatures low during the milk and lye mix.
  3. Slow Mix: To avoid burning the milk, add the lye to the frozen breast milk cubes gradually, stirring continuously.
  4. Monitor Change: Watch for the milk changing color. If it starts turning yellow or emits an ammonia smell, it’s getting scorched.
  5. Full Dissolution: Stir until the breast milk is completely melted and ensure the lye is thoroughly dissolved. This creates a safe mixture for soap making.

By following these steps, the breast milk will retain as much of its nourishing qualities as possible throughout the soap making process. Be mindful to work in a ventilated area and use all recommended safety equipment when handling lye. A successful preparation sets the foundation for a gentle, skin-friendly breast milk soap.

Step-by-Step Process of Making Breast Milk Soap

Making breast milk soap involves a few key stages. Let’s go through each step meticulously:

  1. Freeze Breast Milk: Start by freezing your breast milk in an ice cube tray. This makes it easier to handle during the soap making process.
  2. Prepare Lye Solution: While the milk is freezing, carefully measure and mix your lye with water. Always remember to add lye to water, not the other way round, to avoid a volatile reaction.
  3. Chill Lye Solution: Place the container of lye solution in an ice bath. This helps maintain a low temperature, preventing the milk from scorching when mixed.
  4. Combine Ingredients: Once the milk is frozen and the lye solution is chilled, gradually add lye to the milk cubes. Stir continuously to prevent the milk from burning.
  5. Check Consistency: Keep stirring until the mixture reaches a light trace, similar to thin pudding. This consistency is crucial for ensuring even distribution of all ingredients.
  6. Add Oils: Next, slowly mix in your pre-measured oils (olive oil, coconut oil, etc.). Blend until all components are fully integrated.
  7. Pour into Molds: Pour the soap mixture into your molds. Tap the molds gently to remove any air bubbles.
  8. Cure the Soap: Allow the soap to rest in the mold for at least 24-48 hours before unmolding. Then, cut the soap into bars.
  9. Final Cure: Let the soap bars cure in a cool, dry place for 4-6 weeks. This helps the soap become harder and milder for use.
  10. Testing: Before use, test the soap’s pH to ensure it’s skin-friendly. You can use pH strips for this purpose.

By following these steps, you can create a gentle and nourishing breast milk soap that’s suitable for all skin types, especially sensitive skin. Remember, the key to great soap is not rushing the process and ensuring each step is done with care.

Shea Baby Breast Milk Soap DIY Material Supplement Package

Customizing Your Soap with Additives and Scents

Adding extras to your breast milk soap recipe can enhance its appeal. Here are ideas for customization:

  1. Essential Oils: Elevate your soap with a few drops of essential oils like lavender for a calming effect or peppermint for a refreshing scent. Remember, a little goes a long way. Find oils that are safe for skin and won’t irritate sensitive types.
  2. Natural Exfoliants: For a scrubby texture, consider adding natural exfoliants. Oatmeal soothes skin while poppy seeds provide a gentle scrub. Avoid harsh, rough materials to keep your soap gentle.
  3. Herbs and Botanicals: Infuse your soap with skin-loving herbs. Calendula petals are great for their healing properties. Chamomile can calm irritated skin. Ensure they are finely ground to avoid scratchiness.
  4. Colors: Create visually appealing bars with natural colorants. Turmeric adds a warm hue, and spirulina offers a green tint. Always test for color fastness and skin sensitivity before use.
  5. Milks and Clays: Goat’s milk can boost creaminess, Bentonite clay may help detoxify, and kaolin clay offers a silky feel. Mix these in sparingly to maintain balance in your breastmilk soap recipe.

When adding scents and other elements, do it at trace to ensure even distribution. Always add additives slowly and blend thoroughly. Keep an eye on the texture; it should remain smooth and pourable.

Finally, write down your variations so you can recreate any favorites. Experimentation is key in finding the ideal blend for your skin’s needs. Start simple, and build up as you gain more experience in making breast milk soap.

Curing and Storing Your Homemade Breast Milk Soap

Once your breast milk soap has been meticulously crafted, the final and crucial stage is curing and storing. Here’s how to ensure your soap stays in optimal condition:

Curing Your Soap

  1. Patience is Key: After unmolding, let the soap bars cure for 4-6 weeks.
  2. Proper Ventilation: Place bars in an area with good air circulation.
  3. Avoid Humidity: Keep your soap in a dry location to prevent moisture buildup.
  4. Turning the Bars: Flip the soaps periodically to ensure even curing.
  5. Testing Readiness: Soap is ready when it feels hard and the pH is skin-friendly.

Storing Your Soap

  1. Cool and Dry: Store in a cool, dry place away from direct sunlight.
  2. Air Circulation: Wrap or place soap in a way that allows air flow.
  3. Longevity: Properly cured soap can last several months.
  4. Airtight Containers: To extend shelf life, use an airtight container for storage.

By respecting the curing process and storing your soaps properly, you maximize the soap’s beneficial qualities and lifespan. This ensures that each use is as nourishing and gentle as the last, providing ongoing care for sensitive skin.

Creative Soap Recipes to Try with Breast Milk

When you’ve mastered the basics of soap making with breast milk, it’s time to get creative. Experimenting with different soap recipes allows you to tailor your bars to specific skin needs or scent preferences. Here are a few recipes that are perfect for those looking to add a personal touch to their homemade breast milk soaps.

  • Combine the gentle qualities of breast milk with soothing oats and moisturizing honey. This breastmilk soap recipe is perfect for extra sensitive skin and provides a soft, calming wash.
  • Incorporate lavender essential oil for a relaxing scent. This bar will be great for unwinding at the end of the day and is known for its natural stress-relieving abilities.
  • Ideal for babies, this soap combines the gentle nature of breast milk with the calming properties of chamomile. Both ingredients are known for their soothing effects on irritated or sensitive skin.

Exfoliating Breast Milk Soap with Poppy Seeds:

  • For a mild exfoliant, add poppy seeds to your breast milk soap base. It’s perfect when you need a bit of scrubbing without being too harsh on the skin.

Remember, any additional ingredients like essential oils or herbs should be added at trace to ensure a consistent blend. Always consider skin sensitivity, especially when making soap for those with extra delicate skin, like babies. Keep track of your breastmilk soap recipe so you’re able to recreate any successes or make adjustments as needed.

In conclusion, there’s no limit to the creativity you can bring to your soap-making endeavors with breast milk. With the breastmilk soap recipe, you confidently cater to different skin types and introduce a variety of soothing, nourishing options to your skin care routine.

Conclusion: Embracing Homemade Soap for Sensitive Skin

Final thoughts on breastmilk soap affirm its value. Crafting soap from breast milk harnesses nature’s nourishment for delicate skin. This DIY approach offers personalized skincare options. Breast milk’s innate qualities, paired with chosen oils and additives, yield soaps suited for sensitive users.

Breast milk soap stands out for its customizability. Whether seeking moisture, a gentle scrub, or a specific scent, your breastmilk soap recipe can adapt. Breast milk lends a creamy base to work with. To this, ingredients like olive oil and shea butter add moisturizing properties. Experimentation can lead to a soap that’s perfect for you or your baby’s needs.

The process is not without its technicalities. Attention to safety, especially when handling lye, is vital. Calculating accurate ingredient measures and allowing time for curing are equally important. Yet, the outcome is rewarding—a bar of soap with nourishing benefits for your skin.

Cured breast milk soap, stored properly, is long-lasting. Keeping it dry extends its usability. Offering a homemade solution, breastmilk soap personifies a gentle, loving touch in skincare.

In sum, embracing the craft of making breast milk soap means investing in the gentle care of sensitive skin. It blends the joy of creating with the satisfaction of using a natural, skin-friendly product.

How Sulfur Soap Clears Acne: Unveiling the Facts

Introduction to Sulfur Soap

What Sulfur Soap Is and Key Ingredients

Sulfur Soap, often a sought-after remedy for skin conditions, is a soap enriched with sulfur, a versatile, naturally occurring mineral known for its therapeutic properties. Its prime components include not only sulfur but also adjunctive elements like salicylic acid and resorcinol, which aid in enhancing the effective skin-clearing qualities of the soap.

This combination actively works to minimize acne-causing bacteria, unclog pores and reduce skin oiliness, making it a staple in acne and oily skin treatments. Additionally, its formulation might often include moisturizing agents like aloe vera or glycerin to counteract any potential drying effects of sulfur, offering a balanced approach to skin care.

Historical Use of Sulfur in Skin Care

Sulfur’s history in skincare spans centuries being recognized for its healing capabilities. Ancient civilizations utilized sulfur as a natural remedy to treat a variety of skin ailments, including acne, psoriasis, and eczema. In traditional medicine, practitioners valued it for its antibacterial and antifungal properties, often using it in powdered form to create topical ointments.

Down through the ages, the transition to incorporating sulfur into soap bars significantly broadened its accessibility and ease of use, allowing more people to benefit from its therapeutic properties. Today, sulfur soap continues to be a valuable and effective tool, upheld by both historical reverence and contemporary dermatological use.

Dr.Rashel Ginseng & Sulfur Soap 100gm

Benefits of Sulfur Soap for Skin

Sulfur soap harnesses unique properties that make it a standout choice for managing various skin issues, particularly those tied to bacterial and fungal infections.

Antibacterial and Antifungal Properties

As established in several studies and reinforced in ongoing dermatological practice, sulfur in soap form offers significant antibacterial and antifungal benefits. This makes it an effective option for reducing the presence of harmful microorganisms on the skin. Regular use of sulfur soap can help prevent the formation and spread of acne and other skin conditions driven by bacterial and fungal growth.

Anti-Inflammatory Effects on Acne and Rosacea

Sulfur soap is a boon for those suffering from acne and rosacea, thanks to its anti-inflammatory properties. It not only helps in reducing the redness and swelling associated with acne but also soothes the flare-ups common in rosacea sufferers. This dual efficacy makes it a preferred choice for managing these unsettling skin conditions.

Oil-Control and Pore-Clearing Actions

An added benefit of sulfur soap lies in its ability to control skin oiliness and clear pores. The soap aids in absorbing excess oil while its keratolytic properties help exfoliate the skin, effectively unclogging pores and preventing severe acne manifestations. By regulating oil production and maintaining clean pores, sulfur soap promotes a healthier, clearer complexion.

Sulfur Soap for Different Skin Conditions

Sulfur soap brings more than acne relief. It addresses a variety of skin conditions, adding to its versatility in skincare routines.

Suitability for Eczema and Psoriasis

Sulfur soap’s natural anti-inflammatory properties may provide relief for eczema and psoriasis sufferers. By reducing itchiness and redness, it can soothe irritated skin. However, those with these conditions should proceed with caution and monitor their skin’s response.

Efficacy in Treating Seborrheic Dermatitis and Fungal Infections

Seborrheic dermatitis and fungal infections often need a tough approach. Sulfur soap’s antifungal capabilities are beneficial here. They attack the root cause, helping to alleviate symptoms and prevent recurrence.

Applications for Scabies and Other Skin Issues

Sulfur soap may also be an ally against scabies, an intensely itchy skin condition caused by mites. Its antimicrobial properties can aid in eliminating mites and providing symptom relief. Furthermore, sulfur soap can be effective for other skin issues linked to bacteria and fungi.

Sulfur Soap high Efficient anti itching,dandruff,acne soap for Skin care

Usage Guidelines for Sulfur Soap

How To Properly Use Sulfur Soap

Using sulfur soap effectively can help manage acne and other skin conditions. Start by wetting your skin with warm water. Hold the soap in your hands and rub it to generate a good lather. Apply the lather gently onto your face or other affected areas. Massage it in for a minute or two, then rinse well with water. Pat your skin dry with a clean towel.

Remember, it’s important not to overuse the soap as it can lead to dryness. Also, avoid contact with eyes as sulfur soap can irritate them. Lastly, store the soap in a dry area to maintain its efficacy.

Frequency of Use for Optimal Results

Begin with using sulfur soap once daily, monitoring how your skin responds. If your skin can tolerate it without any negative reactions, consider increasing use to twice a day. For those with oily skin, a morning and night routine may be beneficial. However, it’s crucial not to exceed this frequency to prevent over-drying the skin.

Precautions and Skin Type Considerations

Before diving into regular use, it’s wise to conduct a patch test to see if any irritation occurs. If you have sensitive or dry skin, sulfur soap might not be suitable due to its drying nature. Always listen to your skin; if you notice redness or feel excessive tightness, reduce the frequency of use or discontinue the soap. If problems persist, reaching out to a dermatologist is advised. Users with oily skin may find sulfur soap incredibly beneficial in balancing skin’s oil production.

Potential Side Effects and How to Mitigate Them

While sulfur soap benefits the skin in many ways, being aware of potential side effects is crucial for a safe skincare journey. This section will address common concerns like dryness and irritation, providing guidance on how to mitigate these issues effectively.

Identifying and Managing Dryness and Irritation

Dryness and irritation can sometimes occur when using sulfur soap, especially if you have sensitive skin. Signs may include tight, flaky skin or redness and itchiness. To manage these side effects, limit soap use to once every few days. Always moisturize after cleansing to replenish lost moisture. A gentle moisturizer suitable for sensitive skin can support your skin’s barrier function.

Should symptoms persist, reducing the concentration of sulfur in the soap you are using may be helpful. If irritation develops, temporarily halt the use of sulfur soap and consult with a dermatologist for an alternative solution tailored for your skin type.

Tips for Sensitive Skin Users

Individuals with sensitive skin need to approach sulfur soap with extra care. Avoid over-use as it could lead to increased sensitivity and discomfort. To protect your skin:

  • Start with a patch test to ensure you do not have an adverse reaction.
  • Use soap sparingly and observe your skin’s reaction over several days.
  • Opt for sulfur soaps with a lower sulfur concentration or those formulated with calming ingredients like aloe vera or olive oil.
  • Incorporate soothing skincare products designed for sensitive skin into your routine. These may include fragrance-free, hypoallergenic moisturizers and sunscreens.

Sensitive skin users should always listen to their skin. If you encounter any signs of discomfort after using sulfur soap, scale back usage and consider consulting with a skincare professional for personalized advice.

sulfur soap benefits

Alternative and Complementary Acne Treatments

Sulfur soap provides notable benefits in acne management, but there are times when additional treatments might be necessary. Adapting your skincare routine to include complementary products can enhance overall skin health and tackle stubborn acne problems more effectively.

When to Consider Additional Acne Solutions

Consider integrating other acne treatments if sulfur soap alone does not achieve desired results. Persistent, severe, or cystic acne often requires a multi-pronged approach. Incorporating products with benzoyl peroxide, salicylic acid, or retinoids might be beneficial. These ingredients target different aspects of acne formation and can be combined strategically with sulfur soap for enhanced results. If you experience irritation or minimal improvement after consistent use of sulfur soap, it might be time to explore additional options. Seeking advice from a dermatologist can provide tailored solutions based on your skin’s unique conditions.

Combining Sulfur Soap with Other Skin Care Products

To maximize the benefits of sulfur soap in a comprehensive acne care regimen, consider the balanced use of complementary skincare items. Start by using a mild, non-comedogenic moisturizer after cleansing with sulfur soap to prevent over-drying. Adding a gentle exfoliator into the routine a few times a week can help clear dead skin cells and enhance pore decongestion. Moreover, select products that are specifically designed to combat acne but are also suitable for your skin type. Always perform a patch test when introducing a new product to your routine to ensure compatibility with sulfur soap and prevent adverse reactions.

Where to Find Quality Sulfur Soap

Finding the right sulfur soap is key to enjoying its skin benefits effectively. Here’s how to locate high-quality sulfur soap that can help you manage skin conditions effectively while maintaining skin health.

Shopping Tips for Sulfur Soap in Australia

When shopping for sulfur soap in Australia, consider these essential tips:

  • Check the Ingredients: Always read the label. Look for sulfur as a key active ingredient and check for complementary ingredients like aloe vera or olive oil.
  • Choose Reputable Brands: Opt for sulfur soap from well-known brands that are known for their quality skin care products.
  • Consult Reviews: Go through customer reviews to get an idea of the efficacy and safety of the product.
  • Patch Test: Before using the soap regularly, perform a patch test to ensure it doesn’t irritate your skin.

By following these tips, you’re more likely to find a sulfur soap that suits your skin needs and is effective in treating your specific skin issues.

Recommended Products with Natural Ingredients

For those in Australia looking for sulfur soaps with natural ingredients, here are some top recommendations:

  • Jericho Skincare Australia’s Active Sulphur Soap: This soap is enriched with minerals and contains natural elements like olive oil and aloe vera, making it suitable for oily and acne-prone skin.
  • DermaHarmony 10% Sulfur Soap: Ideal for a variety of skin conditions, including acne, this soap combines sulfur with other skin-soothing components.

Incorporating these sulfate soaps into your skincare regimen can lead to clearer, healthier skin. Always remember to adjust the frequency of use according to your skin’s reaction and consult with a dermatologist if you have severe skin conditions.

DIY Foaming Hand Soap: A Simple How-To Guide

Overview of Foaming Hand Soap

Foaming hand soap is a popular choice for many homes. This soap dispenses foam directly from the bottle, making it easy to use. It is a cost-effective and eco-friendly option. By using less soap per wash, it ensures efficient hand cleaning. This type of soap combines air and liquid soap in a special pump. The pump creates a lather that helps in thorough cleansing. Making foaming hand soap at home is simple and allows for customization. In this guide, we will explore how to create your very own foaming hand soap with a tailored foaming hand soap recipe.

Key Ingredients for DIY Foaming Hand Soap

Creating your own foaming hand soap starts with selecting the right ingredients. A simple foaming hand soap recipe includes a few essentials that ensure quality and effectiveness. You will need a soap base, water, and natural ingredients to add fragrance and benefits.

Common Soap Bases

When choosing a soap base for your DIY foaming hand soap, you have a couple of choices. The most popular bases include:

  • Castile Soap: It’s a natural, olive oil-based soap that is gentle on the skin and easy to find.
  • Liquid Dish Soap: For a more robust cleaning effect, liquid dish soap works well. Make sure it’s mild to avoid skin irritation.
  • Hand Wash Concentrate: These are specifically formulated for use on the skin and can be diluted for foaming soap.

Always start with a soap base that is free from harsh chemicals. It will ensure that your homemade soap is as gentle as it is effective.

Natural Fragrances and Essential Oils

Adding fragrance to your foaming hand soap recipe is more than just about a pleasant scent. Natural fragrances and essential oils can also provide therapeutic benefits. Here are some popular choices:

  • Lavender Oil: For a calming effect, lavender oil is a go-to. It promotes relaxation and is kind to the skin.
  • Tea Tree Oil: Known for its antibacterial properties, tea tree oil makes an excellent addition for deep cleansing.
  • Peppermint Oil: This oil offers a refreshing scent and can invigorate the senses.
  • Citrus Oils: Lemon or orange oils give a zesty fragrance and can uplift your mood.

When using essential oils, a few drops go a long way. They also mix well with various soap bases, enhancing the foaming hand soap’s cleaning power and aroma. Combine these key ingredients correctly, and you’re well on your way to making a unique and personal foaming hand soap at home.

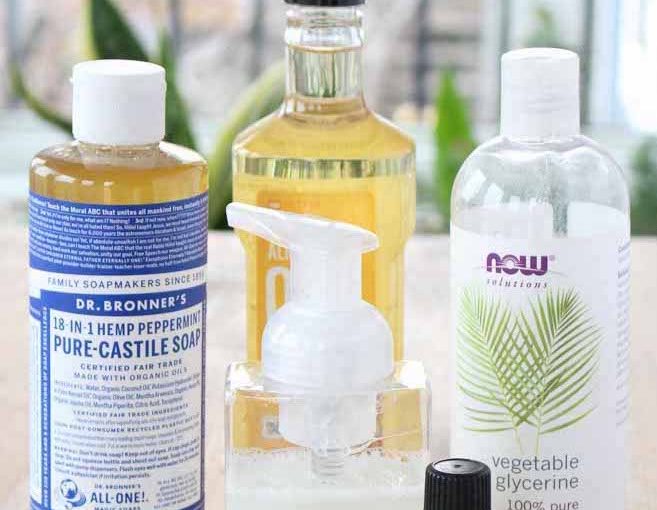
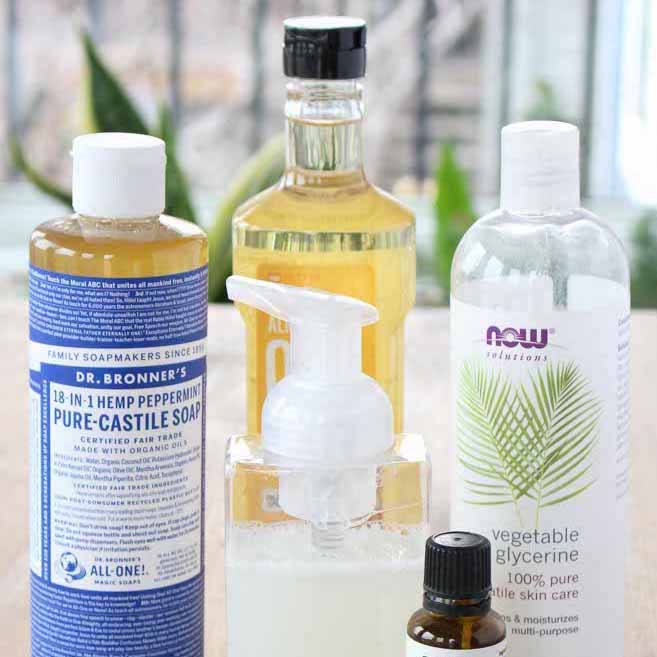
Make your own foaming hand soap

Steps to Make Your Own Foaming Hand Soap

Creating your DIY foaming hand soap is a straightforward process. With the right ingredients in hand, you’re ready to start mixing. The steps below will help you concoct the perfect batch of fragrant foaming hand soap.

Mixing the Ingredients

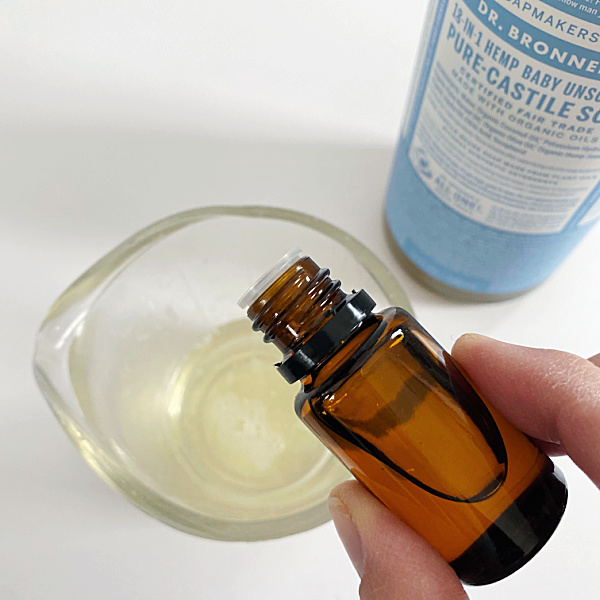
Begin by adding one part of your selected soap base to four parts water in a mixing bowl. This ratio is crucial for ensuring that your soap foams properly. For instance, if you use 1/4 cup of Castile soap, you’ll need to mix it with one cup of water.

Stir the base and water gently until fully blended. Over mixing can reduce foaminess. Next, add a few drops of your chosen essential oils. Between 10 to 20 drops should suffice, depending on the strength of the fragrance you desire.

Make sure to blend these well with the base mixture. The natural oils provide scent and additional cleaning benefits, making your foaming hand soap recipe unique.

Bottling and Storage Tips

After mixing, it’s time to transfer your soap into a foaming soap dispenser. A funnel can help pour the mixture without spillage. Fill the container, but leave a small space at the top. This space ensures the foaming mechanism works without clogs.

For storage, hold the foaming hand soap in a cool, dry place. Avoid direct sunlight as it may affect the soap’s composition and fragrance. It’s best to use the soap within one month for maximum freshness and efficacy.

Labeling your bottles can help identify the scent and the date made. This is especially helpful if you’re creating multiple batches or scents. With your homemade foaming hand soap prepared, you now have an eco-friendly, effective, and personalized hand cleaning option at your fingertips.

Benefits of Using Homemade Foaming Hand Soap

Choosing to make your own foaming hand soap at home comes with several advantages. Here are some of the benefits that can encourage you to dive into this DIY project:

  • Cost-Effectiveness: Homemade foaming hand soap is generally more affordable than store-bought versions. Because you control the ingredients, you can make a larger quantity for less money.
  • Eco-Friendly: Using reusable dispensers for your homemade soap reduces plastic waste significantly. You also have the freedom to choose eco-friendly soap bases and ingredients.
  • Health and Safety: Without harsh chemicals, homemade foaming hand soap is safer for your skin. You avoid potential irritants found in some commercial soaps.
  • Customization: You tailor the foaming hand soap recipe to your preferences. You select the scent and the ingredients that go well with your skin type.
  • Fun Activity: Crafting your own foaming hand soap can be a fun and rewarding hobby. It provides a creative outlet and a sense of accomplishment.
  • Thoughtful Gifts: Handmade soaps make thoughtful presents. You can create unique and personal gifts for friends and family.

By choosing to create your own foaming hand soap, you enjoy these benefits while also having a product that effectively cleans your hands. The satisfaction of using a homemade product that fits your needs is unmatched.

Customization Ideas for Personal Preferences

Customizing your foaming hand soap recipe caters to personal likings and skin needs. Here’s how to tweak your formula:

  • Pick Your Base: Start with a soap base you love. Try Castile soap for a gentle touch or liquid dish soap for a stronger clean.
  • Select Your Scents: Choose essential oils that suit your mood. Lavender for relaxation or citrus for an energy boost are great picks.
  • Adjust the Strength: Control the scent strength with more or fewer oil drops. Find the right balance that pleases your senses.
  • Additives for Skin Care: Include ingredients like aloe vera for extra moisture or vitamin E for skin health.
  • Color Fun: Use food coloring to tint your soap. Just a drop or two can add visual appeal to your creation.
  • Herbs and Botanicals: For texture and extra benefits, add dried flowers or herbs. They provide a spa-like experience.

By incorporating these elements, you turn a basic foaming hand soap recipe into a personal delight. You not only get to enjoy the practical benefits, but also the pleasure of a product tailor-made for you.

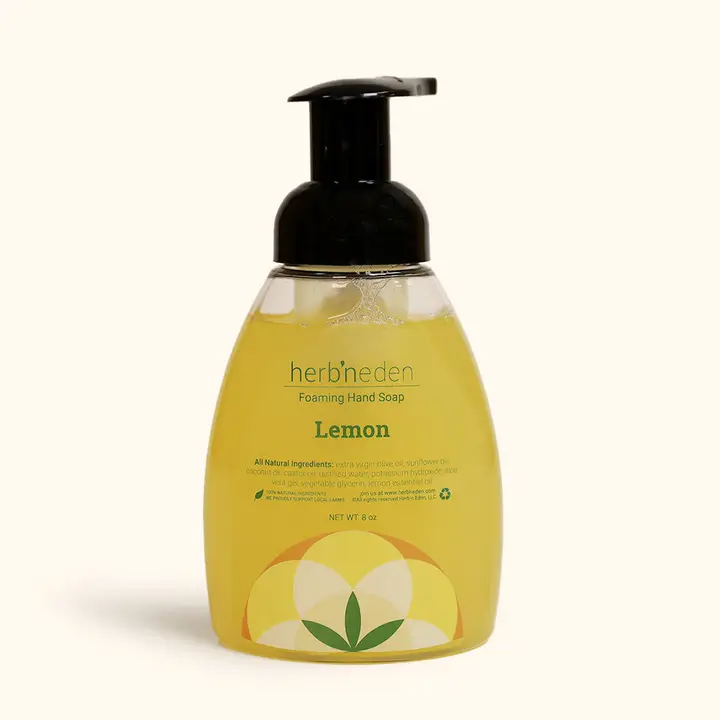
How to Make DIY Foaming Hand Soap

Tips for Long-Lasting Foam and Consistency

Making your foaming hand soap can be very satisfying. But ensuring that it produces a long-lasting foam and maintains consistency is essential. Here are some tips to help you achieve that perfect batch every time:

  • Get the Right Ratio: The correct balance of soap base to water is crucial. Stick to one part soap base to four parts water.
  • Quality Soap Base: Choose a high-quality base like Castile soap for lasting results.
  • Pure Essential Oils: Use 100% pure oils for the best scent and foam stability.
  • Gentle Mixing: Stir the mixture gently to avoid breaking down the foam’s consistency.
  • Clean Dispensers: Regularly clean your soap dispensers to prevent clogs and mold.
  • Avoid Additives: Some additives can reduce foam. Stick to your tried and tested recipe.
  • Room Temperature Storage: Keep your soap in a cool, dry place away from heat and sunlight.

These simple yet effective tips can significantly influence the vitality of your foaming hand soap. Following them will ensure your hand soap remains foamy and consistent in quality, use after use.

DIY: Foaming Hand Soap with Essential Oils

Comparing DIY Soap with Store-Bought Options

When weighing the pros and cons of homemade foaming hand soap against store-bought versions, several key points stand out. Here’s a comparison to help guide your choice:

  • Ingredients Transparency: With DIY soap, you know exactly what goes into your product. Store-bought options often contain undisclosed fragrances and chemicals.
  • Cost Savings: Making your soap at home can save you money. Commercial options might be pricey, especially if they are branded or claim unique benefits.
  • Customization: Handmade soap allows for personalization. Store-bought soap comes in fixed scents and formulas.
  • Eco-Friendliness: Reusing dispensers and choosing eco-friendly ingredients makes DIY soap a greener choice. Store-bought soaps may contribute more to plastic waste.
  • Skin Health: If you have sensitive skin, DIY soaps let you avoid irritants. The gentler ingredients in homemade recipes are kinder to your skin compared to some commercial soaps.
  • Fun Factor: The process of making your own soap can be enjoyable and satisfying. This personal touch is missing when simply purchasing soap off the shelf.

In summary, if you value knowing your ingredients, saving money, and tailoring your soap to your needs and preferences, going the DIY route is beneficial. If convenience and immediate availability are more your focus, store-bought soap might suit your lifestyle better. Both types serve the fundamental purpose of cleaning, but the choice depends on your priorities.

Make Your Own Olive Castile Soap at Home

Introduction to Castile Soap

Castile soap is a gentle and natural cleanser made from vegetable oils. It originated in the Mediterranean region and has become known for its purity and simplicity. Unlike many commercial soaps that contain synthetic detergents and harsh chemicals, castile soap ingredients offers a safe and eco-friendly alternative. It’s highly versatile and can be used for a wide range of cleaning tasks – from bathing to household chores. Castile soap ingredients stands out because it’s made exclusively from plant oils, with olive oil being the most common base. This gives it a unique set of properties that are difficult to match with synthetic cleansers. Not only is it biodegradable, but it’s also free of animal fats and synthetic substances, making it a favorite among those seeking a natural lifestyle.

The process of making your own olive castile soap at home involves a series of steps, from gathering equipment and ingredients to mixing, saponification, and curing. While the process requires attention to detail, the end result is a product that’s both rewarding to make and beneficial for various uses. Plus, the ability to customize your soap with essential oils and other natural additives allows you to create a product that’s tailored to your personal preferences and needs.

In the following sections, we will explore the history and benefits of castile soap ingredients, delve into the core ingredient of olive oil, and provide a step-by-step guide to making your very own olive castile soap at home. We’ll also cover how to address common issues and share final thoughts on the advantages of creating your homemade castile soap.

Proven Benefits And Uses of Castile Olive Oil Soap

History and Benefits of Castile Soap

The origins of Castile soap trace back to the Castile region of Spain, where it was prized for its pure and mild nature. Castile soap’s history is rooted in the Mediterranean, but its exceptional qualities have made it a global staple in natural cleansing. Its simple, olive oil-based formulation honors the tradition of using readily available local ingredients. This rich heritage is accompanied by an impressive array of benefits that have solidified Castile soap’s place in history as a trusted and effective cleanser.

One of the primary advantages of Castile soap is its gentleness on the skin. The absence of artificial additives, fragrances, and colorants that often cause irritation make it suitable for even the most sensitive skin. It’s also environmentally friendly, as its biodegradable nature means it won’t harm waterways or aquatic life. The versatility of Castile soap is remarkable; it can be used for personal hygiene, household cleaning, and even as a base for homemade natural products. The benefits of Castile soap extend beyond the bathroom and into every corner of the conscientious consumer’s home.

The multifaceted functionality of Castile soap is paired with its hydrating properties, derived from the high concentration of olive oil. This main ingredient not only cleanses but also moisturizes, leaving skin feeling soft and nourished. Castile soap’s compatibility with other natural substances allows for customization that can enhance its benefits or target specific needs. By combining Castile soap ingredients with appropriate essential oils, users can create specialized products for aromatherapy, skincare, and more.

Throughout its history, Castile soap has consistently offered a reliable, hypoallergenic solution for a broad range of cleansing tasks, solidifying its place as a beneficial and indispensable tool in natural living. As we explore further, the significance of olive oil, the heart of Castile soap, comes into clearer focus, highlighting how this humble yet mighty substance serves as the foundation for a truly remarkable product.

Olive Oil: The Core Ingredient of Castile Soap

Olive oil is pivotal in creating castile soap. This traditional ingredient is famed for its gentle, moisturizing properties, making it ideal for sensitive skin types. The high content of oleic acid in olive oil enhances the soap’s softening and hydrating effects, which is why it forms the backbone of many natural soaps.

In the making of castile soap, olive oil acts as the primary cleansing agent, offering a mild and nourishing alternative to the harsh chemicals found in commercial soaps. Its antioxidant properties also contribute to the longevity and stability of the soap, ensuring that each bar preserves its quality over time.

When choosing olive oil for castile soap ingredients, selecting a high-quality, pure form ensures the best results. Extra virgin olive oil is most recommended due to its minimal processing, which retains the maximum nutrients beneficial for skin care. The choice of oil also impacts the soap’s texture and lathering qualities, with purer oils lending to a smoother, creamier soap bar.

Furthermore, the versatility of olive oil allows for various soap-making techniques, including cold process and hot process methods, each contributing differently to the final product’s characteristics. Whether blended with other natural oils or used as the sole oil, olive oil remains the critical castile soap ingredients that defines the essence and effectiveness of castile soap.

Step-by-Step Guide: Creating Your Olive Castile Soap

Embarking on the journey of making your own olive castile soap is both exciting and rewarding. This step-by-step guide will help ensure that you have a smooth experience from start to finish, beginning with the necessary equipment.

Equipment Needed

To make olive castile soap, you’ll need specific tools:

  • A large stainless steel or enameled pot for mixing ingredients.
  • A digital scale for accurate measurement of ingredients.
  • Immersion blender for combining oils and lye mixture.
  • Soap molds to shape your soap as it sets.
  • Safety gear including gloves, goggles, and a mask to protect yourself from lye fumes.

Ingredients Breakdown

The primary ingredient in your soap will be olive oil, known for its moisturizing properties. Here’s what you will need:

  • Olive Oil: Acts as the base oil.
  • Distilled Water: Helps to dissolve the lye.
  • Sodium Hydroxide (Lye): Necessary for the saponification process.

Mixing and Saponification Process

  1. Measure olive oil and water using a digital scale to ensure precision.
  2. Slowly add lye to water, mixing continuously in a well-ventilated area (never add water to lye).
  3. Combine lye mixture with olive oil and blend using an immersion blender until the mixture reaches a light trace (similar to thin pudding).
  4. Continue mixing until the mixture thickens and traces more solidly.

Curing and Storage Tips

After pouring into molds, the soap needs to set and cure:

  1. Allow the soap to set in the mold for 24-48 hours until it’s firm enough to unmold.
  2. Cut into bars and place in an area with good air circulation to cure.
  3. Cure the soap for at least 4-6 weeks before using, turning occasionally to ensure even drying.

Following these steps will help you create high-quality olive castile soap that is gentle on the skin and delightful to use!

Versatility of Olive Castile Soap

Olive castile soap has a myriad of uses that go beyond basic cleaning. Castile soap works wonders in personal care, serving as a gentle face wash, shampoo, or body wash, ideal for those with sensitive skin. Its compatibility with diverse skin types makes it a staple in many households.

Its role extends into household chores; castile soap can easily clean dishes, laundry, and even surfaces without leaving toxic residues. The natural properties of olive oil ensure the soap is safe for all members of the family, including pets.

In the garden, olive castile soap becomes an effective pesticide when mixed with water, deterring pests without harming plants. The soap’s ability to degrade naturally ensures a minimal environmental footprint, making it an attractive option for eco-conscious consumers.

From head to toe, kitchen to garden, olive castile soap’s versatility shines. Its multitasking nature simplifies the cleaning routine, replacing multiple products on the shelf with one effective solution. The ease and efficacy of olive castile soap encompass a variety of needs, establishing its place in any green lifestyle.

Castile Olive Oil - All Natural Soap Co - Award Winning Handmade Soaps

Customizing Your Castile Soap

Personalizing your homemade castile soap can enhance its benefits and add a delightful aroma. Below are ways to customize your soap with essential oils and create different soap variants.

Adding Essential Oils

Essential oils not only infuse your soap with a pleasant scent but also can provide additional skin benefits. For a calming effect, add lavender or chamomile oil. For a refreshing cleanse, consider peppermint or citrus oils. To incorporate, mix the essential oil into the soap batter at light trace, ensuring a thorough blend.

  1. Decide the purpose: Choose oils that fit your desired soap properties.
  2. Measure carefully: Use about 1 ounce of oil per pound of soap to prevent overpowering.
  3. Stir thoroughly: Ensure the oil is evenly distributed throughout the soap.

The inclusion of essential oils can transform the basic soap into a therapeutic experience, elevating the simple cleaning routine to a spa-like luxury.

Creating Variants: Bastile Soap

If you want a soap with a slightly different feel than traditional pure olive oil castile soap ingredients, consider making bastile soap. Bastile soap consists mainly of olive oil but includes small amounts of other oils or butters, enhancing its moisturizing properties without compromising gentleness.

  1. Keep base oil dominant: Ensure olive oil makes up 70-90% of the total oils.
  2. Add supporting oils: Incorporate oils like coconut or almond for a creamier lather.
  3. Mix and match: Experiment with shea butter or cocoa butter for added nourishment.

Creating bastile soap allows for customization in the feel and function, catering to specific skincare needs while maintaining the mild and gentle cleansing properties of traditional castile soap ingredients.

Troubleshooting Common Issues

When diving into the process of creating your own olive castile soap, you may encounter a few common issues. Below are some typical problems that may arise, along with solutions to help you overcome them.

Soap Not Reaching Trace

If your mixture isn’t thickening to trace, you might need to blend it longer. Ensure that your immersion blender is fully submerged to prevent air pockets. Also, check if your measurements for lye and oils are precise, as incorrect ratios can affect saponification.

Soap Too Thick or Quick to Harden

If your soap batter has thickened too quickly or is hardening too soon, the temperature may be too high. Make sure to control the temperature during the saponification process. Additionally, some essential oils or additives can speed up this process, so add them slowly and be prepared to pour into molds quickly.

White Spots or Streaks

White spots could indicate undissolved lye or air bubbles. Stir the mixture thoroughly before pouring into molds to ensure all the lye is incorporated. Gently tap the mold on the counter to release trapped air bubbles.

Soap is Slimy or Soft

This can happen when there’s too much oil or not enough lye. Double-check your recipe with a soap calculator to confirm precise ingredient amounts. Soap might also need a longer curing time to fully harden.

Uneven Coloring or Scent

Inconsistent coloring or scent distribution often occurs when additives are not adequately mixed. To avoid this, stir your essential oils or colorants evenly into the soap batter before pouring.

By keeping a watchful eye on the process, being precise with your ingredients, and understanding the behavior of your soap mix, you can prevent and correct these issues to yield a beautifully crafted castile soap.

Natural Soap: Castile & Shea

Final Thoughts on Homemade Olive Castile Soap

Creating your own olive castile soap at home brings satisfaction beyond having a natural, versatile cleanser. It connects you with age-old traditions of soap making and fosters a deeper understanding of the ingredients that come into contact with your skin. Homemade castile soap embodies simplicity and purity, offering a kinder alternative to harsh, store-bought detergents. By taking the time to craft your soap, you control the quality and contents, tailoring it to your specific needs and preferences. Whether you choose to stick with a classic castile formula or explore the added richness of bastile variants, your homemade soap is sure to become a cherished part of your daily routine. Moreover, your eco-conscious choice significantly reduces environmental impact, aligning your cleaning practices with sustainable living.

From troubleshooting common issues to customizing scents and benefits, the journey of soap making is one of experimentation and learning. Each batch of soap is a chance to refine your technique and create a product that nourishes and cleanses with none of the unnecessary additives found in commercial soaps. As you continue to make olive castile soap, you’ll not only gain a valuable skill but also the pleasure of using a soap that truly meets your ethical and personal standards – a genuine reflection of your commitment to natural living.

A Guide of Unveiling the Magic of Jones Road Eye Shadow

Introduction:

Jones Road Beauty, founded by makeup artist and clean beauty advocate Bobbi Brown, has taken the beauty world by storm with its high-quality, clean, and sustainable products. Among its standout offerings is the Jones Road eye shadow, which has quickly become a favorite among beauty enthusiasts. In this comprehensive guide, we will delve into the magic of Jones Road eye shadow, exploring its formulation, application techniques, color range, and more. Whether you’re a makeup novice or a seasoned beauty aficionado, this article will equip you with all the information you need to master the art of using Jones Road eye shadow.

Jones Road Mini Miracle Balms Coming Back Tonight 11pm CST

Part 1: Formulation and Ingredients

Level 1: The Clean Beauty Promise
Jones Road Beauty is committed to clean beauty, and its eye shadow is no exception. The brand prides itself on using high-quality, non-toxic ingredients, ensuring that its products are safe and gentle on the skin. The eye shadow formulation is free from harmful chemicals, parabens, and synthetic fragrances, making it suitable for even the most sensitive eyes.

Level 2: Innovative Formulation Technology
The Jones Road eye shadow features an innovative formulation that seamlessly blends natural, nourishing ingredients with high-performance color pigments. The result is a velvety-smooth texture that glides onto the eyelids with ease, delivering rich, long-lasting color payoff. Infused with skincare benefits, the eyeshadow helps to nourish and protect the delicate eye area while enhancing your natural beauty.

Part 2: Color Range and Finishes

Level 1: Versatile Shades for Every Look
Jones Road offers an extensive range of eye shadow shades, catering to a variety of preferences and skin tones. Whether you prefer soft, neutral hues for an everyday look or bold, vibrant colors for a statement eye, there’s a shade for everyone. From matte to shimmer finishes, the eyeshadow collection allows you to create endless looks, from subtle and sophisticated to bold and daring.

Level 2: Buildable and Blendable
The versatility of Jones Road eyeshadow extends beyond its color range. Each shade is carefully curated to be buildable and blendable, allowing you to customize the intensity and depth of your eye makeup. Whether you’re going for a sheer wash of color or a more dramatic, smoky effect, the eye shadow effortlessly transitions from day to night, making it a must-have in any makeup collection.

Part 3: Application Techniques

Level 1: Effortless Application
Applying Jones Road eye shadow is a breeze, thanks to its velvety-smooth texture and blendable formula. Whether you prefer to use brushes or your fingertips, the eyeshadow effortlessly adheres to the skin, creating a seamless, professional-looking finish. Its buildable nature allows for easy layering and blending, making it perfect for both beginners and experienced makeup artists.

Level 2: Versatile Application Options
In addition to traditional eyelid application, Jones Road eye shadow can be used in a multitude of ways to create different effects. Whether you want to define the crease, highlight the brow bone, or even use it as an eyeliner, the eye shadow offers limitless versatility. Its buttery texture and long-lasting formula ensure that your eye makeup stays put throughout the day, without any creasing or fading.

Part 4: Longevity and Wear

Level 1: All-Day Wear
One of the standout qualities of Jones Road eye shadow is its impressive longevity. Once applied, the eyeshadows stay put throughout the day, without any need for touch-ups. Its crease-resistant and fade-proof formula ensures that your eye makeup looks fresh and vibrant from morning to night, making it ideal for those with busy lifestyles.

Level 2: Minimal Maintenance
Despite its long-wearing nature, Jones Road eyeshadow is incredibly easy to remove at the end of the day. A gentle cleanser or makeup remover effortlessly lifts the color from the skin, leaving behind no residue or staining. This hassle-free removal process makes it a convenient choice for those who prioritize simplicity in their beauty routine.

Part 5: Sustainability and Eco-Friendly Packaging

Level 1: Sustainable Practices
As a brand committed to sustainability, Jones Road Beauty places a strong emphasis on eco-friendly practices throughout its product development and packaging. The eyeshadow compacts are thoughtfully designed with recyclable materials, minimizing environmental impact and promoting a circular beauty economy.

Level 2: Refillable Options
To further reduce waste, Jones Road offers refillable options for its eyeshadow compacts. Once you’ve used up your favorite shade, simply refill the compact with a new pan, reducing the need for excess packaging and promoting a more sustainable approach to beauty consumption.

Jones Road Miracle Balm | Dusty Rose Rose

Part 6: Jones Road Eye Shadow: Versatility at Its Best

Jones Road Eye Shadow is known for its versatility, making it the go-to choice for makeup enthusiasts and professionals alike. The range of shades and finishes available ensures that there is an option for every style and occasion. Whether you prefer a subtle, natural look or a bold, statement-making eye, Jones Road Eyeshadow has you covered.

The velvety texture of the eyeshadow allows for effortless blending, making it easy to achieve a seamless, professional-looking application. The buildable formula means you can easily customize the intensity of the color to suit your preferences. With Jones Road Eyeshadow, you can create endless eye looks, from soft and romantic to dramatic and smoky.

In addition to its versatility in creating various eye looks, Jones Road Eyeshadow can also be used in multiple ways. The richly pigmented shades can double as eyeliners when applied with a damp brush, or even as brow fillers for a quick and easy brow enhancement. This multitasking capability makes Jones Road Eye Shadow a must-have in any makeup kit.

Whether you are a makeup novice or a seasoned pro, Jones Road Eyeshadow offers the versatility and performance you need to unleash your creativity and enhance your natural beauty.

Part 7: Jones Road Eye Shadow: Long-Lasting Wear

One of the standout features of Jones Road Eyeshadow is its long-lasting wear. The high-quality formula is designed to stay put all day, without fading, creasing, or smudging. This means you can trust that your eye look will remain vibrant and fresh from morning until night.

The long-lasting wear of Jones Road Eyeshadow is attributed to its carefully curated ingredients, which have been selected for their staying power and performance. The finely milled pigments adhere to the skin evenly and seamlessly, creating a smooth and even base that resists movement and wear throughout the day.

Additionally, the eye shadow formula is designed to be crease-resistant, so you can say goodbye to the frustration of midday touch-ups. Whether you have oily lids or live in a humid climate, Jones Road Eye Shadow is up to the challenge, ensuring that your eye look stays flawless and vibrant all day long.

With Jones Road Eye Shadow, you can have confidence in the longevity and performance of your eye makeup, allowing you to focus on enjoying your day without worrying about makeup touch-ups.

Jones Road Just Dropped a Silky New Bronzer

Part 8: Jones Road Eye Shadow: Clean Beauty at Its Finest

Jones Road is clean beauty, and this commitment extends to its eye shadow range. Jones Road Eye Shadow without potentially harmful ingredients such as parabens, phthalates, and synthetic fragrances, is making it a safe and gentle choice for your delicate eye area.

In addition to being free from harmful chemicals, Jones Road Eyeshadow is also vegan and cruelty-free, ensuring that you can feel good about the products you are using on your skin. The brand’s dedication to ethical and sustainable practices means that you can trust the quality and integrity of each product.

Jones Road Eyeshadow is recyclable packaging, further reflecting the brand’s commitment to sustainability and environmental consciousness. This ensures that you can indulge in your love for makeup without compromising your values.

With Jones Road Eye Shadow, you can enjoy the peace of mind that comes with using clean, ethically produced products, while still achieving professional-level results. Embrace the beauty of clean cosmetics with Jones Road Eyeshadow, and experience the difference for yourself.

Conclusion:

Jones Road eye shadow is a testament to the brand’s commitment to creating clean, high-performance cosmetics that deliver exceptional results while respecting the environment. With its innovative formulation, versatile color range, and long-lasting wear, it has become a staple in the makeup kits of beauty enthusiasts worldwide. Whether the sustainable ethos, clean ingredients, or stunning color payoff, Jones Road eyeshadow is sure to elevate your beauty routine and empower you to create endless eye looks with ease.

The Milani Eye Shadow Pencil: A Complete Review and Tutorial

Introduction

Welcome to the ultimate guide to Milani Eye Shadow Pencil! If you’re a makeup lover looking for a versatile, long-lasting eye shadow option, then you’ve come to the right place. In this comprehensive review, we’ll dive into the world of Milani Eye Shadow Pencil and explore everything you need to know about this popular beauty product. From its formulation and application to its pros and cons and tips for achieving the perfect eye look, we’ve got you covered. So, grab your favorite makeup brush and let’s get started!

Part 1: Formulation and Shades

Level 1: Formulation of Milani Eye Shadow Pencil
Milani Eye Shadow Pencil is a creamy, long-wearing eyeshadow pencil that glides on effortlessly and delivers intense, pigmented color in just one swipe. Its smooth, blendable formula is infused with nourishing ingredients like chamomile and vitamin E, making it gentle on the delicate skin around the eyes. Plus, it’s waterproof and crease-resistant, making it perfect for all-day wear.

Level 2: Shades Available
Milani Eye Shadow Pencil comes in a wide range of stunning shades, from neutral hues like taupe and bronze to vibrant colors like turquoise and violet. Whether you’re going for a subtle daytime look or a bold, dramatic eye, there’s a shade to suit every makeup style and skin tone. With so many options to choose from, the possibilities are endless!

Milani Eye Shadow Pencil

Part 2: Application Techniques

Level 1: How to Apply Milani Eye Shadow Pencil
To apply Milani Eye Shadow Pencil, simply twist up the pencil and glide it directly onto the eyelids. For a sheer wash of color, blend it out with your fingers or a brush. For a more intense look, layer the product to build up the color. The pencil’s creamy texture makes it easy to blend and smudge, allowing you to create a variety of eye looks with ease.

Level 2: Tips for Achieving the Perfect Eye Look
To achieve the perfect eye look with Milani Eyeshadow Pencil, start by applying a matte or shimmer eyeshadow primer to create a smooth, even base. Then, use the pencil to draw a line along the upper lash line and blend it out with a smudger brush for a smoky effect. For a pop of color, apply the pencil to the lower lash line and blend it out with a pencil brush. Finish the look with mascara and eyeliner for added definition.

Part 3: Pros and Cons

Level 1: Pros of Milani Eye Shadow Pencil
One of the major advantages of Milani Eyeshadow Pencil is its long-lasting, waterproof formula. Once it sets, it stays put all day without fading or creasing, making it perfect for busy days and special occasions. Additionally, the pencil’s creamy texture and easy-to-use format make it a great option for beginners and makeup enthusiasts alike.

Level 2: Cons of Milani Eye Shadow Pencil
While Milani Eyeshadow Pencil has many great qualities, it’s important to note that it may not be the best choice for those with oily eyelids, as the creamy formula can sometimes smudge or fade over time. Additionally, some users may find that the pencil needs to be sharpened frequently, which can lead to product wastage.

Part 4: Versatility and Longevity

Level 1: Versatility of Milani Eye Shadow Pencil
Milani Eyeshadow Pencil is incredibly versatile, allowing you to create a variety of eye looks with just one product. Whether you prefer a simple wash of color or a bold, graphic eye, the pencil has the versatility to meet your needs. Plus, its convenient pencil format makes it perfect for on-the-go touch-ups and travel.

Level 2: Longevity of Milani Eye Shadow Pencil
One of the standout features of Milani Eyeshadow Pencil is its impressive longevity. Once applied, the color sets and stays put without budging, smudging, or fading throughout the day. Whether you’re braving the elements or hitting the dance floor, you can trust that your eye look will stay flawless from morning to night.

Part 5: Final Thoughts and Recommendations

Level 1: Final Thoughts on Milani Eye Shadow Pencil
In conclusion, Milani Eyeshadow Pencil is a must-have beauty product for anyone looking for a versatile, long-lasting eye shadow option. Its creamy, blendable formula, wide range of shades, and impressive longevity make it a standout choice for creating a variety of eye looks, from subtle to striking. Whether you’re a makeup novice or a seasoned pro, this pencil is sure to become a staple in your collection.

Level 2: Recommendations for Using Milani Eye Shadow Pencil
For best results, we recommend pairing Milani Eyeshadow Pencil with a quality eyeshadow primer to enhance its longevity and color payoff. Additionally, experiment with different application techniques, such as layering and blending, to discover your favorite ways to use the pencil. With a little creativity and practice, you’ll be able to achieve stunning eye looks with ease.

Milani Eye Shadow Pencil

Part 6: Long-Lasting Formula

The Milani Eye Shadow Pencil is formulated to be long-lasting, ensuring that your eye makeup stays put all day long. The creamy texture applies smoothly and dries down to a budge-proof finish, so you can trust that your eye shadow will remain in place without fading, creasing, or smudging.

The water-resistant formula of the eye shadow pencil means that it can withstand sweat, humidity, and tears without compromising the vibrant color payoff. Whether you’re going about your day, attending a special event, or hitting the dance floor, you can count on the Milani Eye Shadow Pencil to keep your eye makeup looking flawless from morning until night.

The long-lasting formula also makes the eye shadow pencil ideal for creating elaborate eye makeup looks that require precision and staying power. Whether you’re crafting a smoky eye, a cut crease, or a bold graphic eye, the Milani Eyeshadow Pencil provides the control and durability you need for flawless results.

With the Milani Eyeshadow Pencil, there’s no need to worry about touch-ups or reapplication throughout the day. Enjoy the peace of mind that comes with knowing your eye makeup will stay put, no matter where the day takes you.

Part 7: Versatile Shades

The Milani Eye Shadow Pencil is available in a wide range of versatile shades, making it easy to find the perfect color to complement any makeup look or occasion. Whether you prefer subtle neutrals, bold brights, or shimmering metallics, there’s a shade for everyone in the Milani Eyeshadow Pencil collection.

Neutral shades like “Champagne Toast” and “Earl Grey” are perfect for creating everyday looks that enhance your natural beauty with a touch of color and shimmer. These versatile shades can be worn alone for a soft, effortless look, or paired with other eye shadows to add depth and dimension to your eyes.

For those who love to make a statement with their eye makeup, the Milani Eye Shadow Pencil offers bold shades like “Royal Purple” and “Aqua Blue.” These vibrant hues are perfect for creating eye-catching looks that demand attention and showcase your creativity.

In addition to solid colors, the Milani Eyeshadow Pencil also comes in versatile metallic shades like “Golden Bronze” and “Black Gold Foil,” adding a touch of glamour and sophistication to your eye makeup. These shades are perfect for special occasions or when you want to elevate your everyday makeup with a touch of luxury.

No matter your personal style or the occasion, the Milani Eyeshadow Pencil has a shade to suit your needs, making it a versatile and essential addition to any makeup collection.

Part 8: Convenient Application

The Milani Eye Shadow Pencil offers a convenient and mess-free way to apply eye shadow, whether you’re at home or on the go. The pencil format makes it easy to control and apply the product precisely, allowing you to achieve your desired eye makeup look with minimal effort.

The creamy texture of the eye shadow pencil glides effortlessly onto the skin, delivering vibrant color payoff with just a few swipes. Thanks to its smooth and blendable formula, the Milani Eye Shadow Pencil is ideal for creating a variety of eye makeup looks, from simple washes of color to intricate designs.

The compact and portable nature of the eye shadow pencil makes it perfect for throwing into your bag or purse for touch-ups throughout the day. Whether you’re traveling, heading to work, or simply going about your daily activities, the Milani Eye Shadow Pencil offers a convenient solution for keeping your eye makeup looking fresh and vibrant.

In addition to its easy application, the eye shadow pencil can also double as an eyeliner, allowing you to create versatile and dynamic eye looks using just one product. Whether you prefer a subtle, smudged liner or a bold, graphic wing, the Milani Eyeshadow Pencil provides the versatility and control to achieve your desired result.

With the Milani Eye Shadow Pencil, achieving stunning eye makeup looks has never been easier or more convenient. Enjoy effortless application and flawless results, no matter where you go.

Milani Eye Shadow Pencil

Conclusion

In conclusion, Milani Eye Shadow Pencil offers a fantastic combination of pigmented color, creamy formulation, and long-lasting wear, making it a top choice for all makeup enthusiasts. Whether you’re new to makeup or a seasoned pro, this versatile pencil is sure to become a staple in your beauty routine. So, why not give it a try and see the difference it can make for your eye looks?

Stunning Green Eye Shadow Ideas to Elevate Your Makeup Game

Introduction

Eye makeup has the power to completely transform your look, and one of the most intriguing shades to play with is green. Whether you’re feeling bold or just want to add a touch of whimsy to your everyday look, green eye shadow can be your go-to choice. In this article, we’ll explore 10 stunning green eye shadow ideas to help you elevate your makeup game and make a statement with your eye makeup.

50+ Face Makeup Ideas for Spring | Art and Design

Part 1: Green Eye Shadow For Daytime

Level 1: Subtle Green
For a soft and wearable daytime look, opt for a light green eye shadow in a matte or shimmer finish. This can add a touch of color to your eyes without being too overwhelming. Pair it with minimal makeup for a fresh and effortless look.

Level 2: Green Smokey Eye
If you’re feeling a bit more daring, try a green smokey eye for a daytime look. Use a darker green shade to create depth and definition in the crease, and blend it out with a lighter green shade on the lid. This will create a sultry and polished look that’s perfect for daytime events or even a day at the office.

Part 2: Green Eye Shadow For Nighttime

Level 1: Emerald Sparkle
For a glamorous nighttime look, a bold emerald green eye shadow is a show-stopping choice. Look for a highly pigmented and shimmery emerald green shade to create a stunning and eye-catching effect. Pair it with black eyeliner and voluminous lashes for a striking nighttime look.

Level 2: Green Halo Eye
For a unique and mesmerizing nighttime look, try a green halo eye. This technique involves applying a light green shade to the center of the lid, a darker shade to the inner and outer corners, and blending them together for a halo effect. This creates a stunning and ethereal look that’s perfect for a night out.

Part 3: Green Eye Shadow For Special Occasions

Level 1: Green Glitter
For special occasions such as weddings or formal events, green glitter eye shadow can add a touch of sparkle and sophistication to your look. Look for a finely milled green glitter shadow and apply it to the center of the lid for a dazzling effect. Pair it with a neutral crease shade and winged eyeliner for a polished finish.

Level 2: Green Cut Crease
For a high-impact and artistic look for special occasions, a green cut crease is a fabulous choice. Use a light green shade to create a sharp cut crease and fill in the lid with a darker green shade for contrast. This technique creates a bold and dramatic look that’s sure to turn heads at any special event.

Part 4: Green Eye Shadow For Experimenting

Level 1: Green Graphic Liner
For those who love experimenting with makeup, green eye shadow can be used to create a bold and artistic graphic liner look. Use a vibrant green shade to create a graphic winged liner or a geometric design on the lids for a fun and creative look.

Level 2: Green Monochromatic Look
For a cohesive and trendy makeup look, consider going for a monochromatic green eye shadow look. Use a range of green shades in different finishes to create a multidimensional and eye-catching look. This can be a great way to experiment with texture and color while creating a harmonious and stunning makeup look.

Part 5: Green Eye Shadow Tips and Tricks

Level 1: Use an Eye Primer
To make your green eye shadow pop and last all day, always start with an eye primer. This will create a smooth and even base for the eye shadow to adhere to, intensifying the color and improving its longevity.

Level 2: Blend, Blend, Blend
When working with green eye shadow, blending is key to achieving a seamless and polished look. Use a fluffy blending brush to blend the colors together, ensuring there are no harsh lines and creating a smooth transition between different shades.

green eye shadow ideas

Part 6: Earthy Tones

For a more earthy and natural look, consider using green eye shadow in shades of moss, olive, and forest green. These tones can be paired with brown and gold shades to create a beautiful and understated look. Start by applying a light brown shade all over the lid as a base, then add a pop of green to the outer corner and blend it towards the center of the eye. Finish off with a touch of gold in the inner corner and along the brow bone to add some brightness to the look. This earthy green eye shadow look is perfect for a daytime event or a casual hangout with friends.

Part 7: Bold and Bright

If you’re feeling more adventurous, don’t be afraid to experiment with bold and bright green eye shadow. Neon green, lime green, or emerald shades can create a stunning and eye-catching look. To pull off this daring style, start by priming your eyelids to ensure the color stays vibrant and doesn’t crease. Then, pack the bright green shade onto the lid, and blend it out towards the crease. Pair it with a thin winged eyeliner and lots of mascara to balance out the look. This bold green eye shadow idea is perfect for a night out or a special event.

Part 8: Metallic Green

For a touch of glamour, consider using metallic green eye shadow to add some shimmer and sparkle to your look. Shades like jade, teal, and seafoam green can create a mesmerizing and ethereal effect. To achieve this look, start by applying a neutral brown shade as a base, then pack the metallic green onto the lid. Blend it out towards the crease and add a touch of highlighter in the inner corner to really make the eyes pop. This metallic green eye shadow idea is perfect for a formal event or a night out where you want to add a touch of sophistication to your makeup look.

green eye shadow ideas

Part 9: The Power of Complementary Colors with Green Eye Shadow

When it comes to green eye shadow, choosing complementary colors can make your eyes pop and create a stunning contrast. For those with green or hazel eyes, using reddish or purple hues can bring out the green in your eyes. Consider blending a warm plum shade into the crease or using a deep cranberry shade. As an eyeliner to enhance the natural green tones in your eyes.

If you have brown eyes, pairing green eye shadow with bronze or gold shades can create a striking and captivating look. The warm undertones of these colors can create a beautiful harmony with the green. And adding depth and dimension to your eye makeup.

For those with blue eyes, using warm, earthy tones such as copper or terracotta alongside green eye shadow can create a stunning contrast. These warm hues can intensify the blue of your eyes while the green adds a unique. And captivating element to the overall look.

Experimenting with complementary colors and green eye shadow can help you discover new and exciting ways to enhance your eye color and create captivating makeup looks.

Conclusion

Green eye shadow is a versatile and captivating choice for makeup enthusiasts looking to spice up their eye makeup routine. Whether you opt for a subtle daytime look or a bold and dramatic nighttime look. Green eye shadow can make a statement and elevate your overall makeup game. Experiment with different shades, finishes, and techniques to find the perfect green eye shadow look. It suits your style and personality. With these 10 stunning green eye shadow ideas and tips, you’ll be able to create eye-catching looks that are sure to turn heads and leave a lasting impression.

Unleash Your Boldness with Doritos Eye Shadow

Introduction

When it comes to makeup, the possibilities are endless. From subtle and natural looks to bold and daring statements, makeup allows us to express ourselves in unique and creative ways. One of the latest trends to hit the beauty world is the use of unconventional products to create striking looks. Enter Doritos eye shadow – a bold and unexpected choice that is taking the makeup world by storm.

Part 1: The Rise of Unconventional Beauty Trends

Level 1: The beauty industry is constantly evolving, with new trends and styles emerging regularly. From the rise of natural and clean beauty to the embrace of bold and colorful looks, there’s a trend for everyone.

Level 2: However, in recent years, there has been a shift towards using unconventional products in makeup application. From food items like Doritos to household items like tape and even clothing dye, beauty enthusiasts are finding creative ways to enhance their looks.

Doritos-inspired eye makeup

Part 2: The Craze for Doritos Eye Shadow

Level 1: Doritos eye shadow has gained significant attention on social media platforms, with beauty influencers and makeup artists showcasing their unique creations using the popular snack.

Level 2: The vibrant and bold colors of Doritos chips lend themselves perfectly to creating eye-catching eye shadow looks. From fiery reds to zesty greens and bright yellows, Doritos eye shadow offers a range of shades that can be used to create stunning and dynamic eye looks.

Part 3: The Art of Creating Doritos Eye Shadow

Level 1: Creating Doritos eye shadow involves a few simple steps. First, the Doritos chips are crushed into a fine powder using a mortar and pestle or a food processor.

Level 2: Once the chips are finely ground, they can be mixed with a neutral base such as eyeshadow primer or coconut oil to create a smooth and pigmented eye shadow. The result is a vibrant and unique eye shadow that is sure to turn heads.

Part 4: Embracing Creativity and Self-Expression

Level 1: The beauty world is all about self-expression and creativity, and the use of Doritos eye shadow is a perfect example of how makeup enthusiasts are pushing the boundaries and thinking outside the box.

Level 2: By embracing unconventional beauty trends like Doritos eye shadow, individuals can showcase their personality and unique sense of style through their makeup looks. It’s a fun and daring way to express oneself and stand out in a sea of traditional beauty looks.

Part 5: The Future of Unconventional Beauty

Level 1: The popularity of Doritos eye shadow is just one example of the growing trend of unconventional beauty practices. As individuals continue to experiment and push the boundaries of traditional makeup, we can expect to see even more unique and unexpected beauty trends in the future.

Level 2: Whether it’s using food items, household products, or other non-traditional items in makeup application, the beauty world is evolving to embrace creativity and self-expression in new and exciting ways.

Doritos-inspired eye makeup

Part 6: The Launch

The anticipation for the release of the Doritos eyeshadow palette was at an all-time high. After months of teasing and hinting, the official launch date was finally set. Fans of both makeup and Doritos were excited to get their hands on the unique product.

The marketing team went all out for the launch, hosting a live event that was broadcasted on social media platforms. There were giveaways, contests, and even a special appearance by a popular beauty influencer who demonstrated the versatility of the eyeshadow shades.

As the clock struck midnight on the launch date, the Doritos eyeshadow palette became available for purchase online. The website was flooded with orders from eager customers who couldn’t wait to create bold, vibrant eye looks inspired by their favorite snack.

The initial response was overwhelmingly positive, with many users taking to social media to share their excitement and showcase their creative makeup looks using the Doritos eyeshadow palette. The launch was a huge success, and the brand knew they had a hit on their hands.

Part 7: Collaborations and Inspirations

Following the successful launch of the Doritos eyeshadow palette, the brand began exploring potential collaborations to further expand the product’s reach. These collaborations led to the creation of exclusive tutorials, tips, and tricks for using the eyeshadow shades in unique and unexpected ways. The diverse range of colors allowed for endless possibilities, from subtle, everyday looks to bold and dramatic styles that captured the essence of the Doritos brand.

In addition to collaborations, the Doritos eyeshadow palette also served as inspiration for makeup artists and enthusiasts alike. The striking colors and high pigmentation encouraged creativity and experimentation, as users found new ways to incorporate the palette into their looks.

The brand showcased user-generated content on their social media platforms, featuring individuals who had embraced the playful and vibrant spirit of the Doritos eyeshadow palette. The community of fans continued to grow as more and more people discovered the joy of expressing themselves through makeup.

Part 8: The Future of Doritos Eye Shadow

As the Doritos eyeshadow palette continued to gain popularity, the brand saw an opportunity to further innovate and expand their makeup offerings. They began developing additional products, including lipsticks, blushes, and highlighters inspired by the bold and flavorful world of Doritos.

These new releases with the same enthusiasm as the original eyeshadow palette. Incorporate their favorite snack into every aspect of their beauty routine. The brand’s commitment to boldness and creativity continued to shine through in their makeup line.

Furthermore, the success of the Doritos eyeshadow palette opened the door for collaborations with other iconic snack brands. Resulting in limited-edition collections that celebrated the unique flavors and experiences associated with these beloved treats.

The future of Doritos eye shadow looked bright, with the brand poised to continue pushing boundaries and redefining the intersection of food and beauty. The innovative spirit that launched the original palette remained at the core of the brand’s mission, inspiring individuals to express themselves fearlessly and unapologetically through makeup.

Doritos-inspired eye makeup

Conclusion

Want your Doritos-inspired eye makeup to last all day? Start with a good eyeshadow primer to create a smooth base and prevent creasing. Then, use a small, dense brush to pack on the orange eyeshadow, ensuring maximum color payoff. Next, apply the yellow shade to the lid, using a damp brush to intensify the shimmer. To add depth and dimension, blend a touch of red shadow into the outer corner of the eye. Finish with a spritz of setting spray to lock the colors in place. This simple technique will ensure that your Doritos-inspired eye makeup stays vibrant and crease-free all day long.

For a sultry take on the Doritos-inspired eye look, try a smokey eye with a twist. Start by applying a matte brown eyeshadow to the outer corner and crease of the eye. Blending it out to create a soft, smokey effect. Next, pack on a shimmery yellow shade to the lid, using a flat brush for maximum impact. To add a pop of color, blend a touch of red eyeshadow onto the outer corner. Finish with a bold winged eyeliner and a few coats of mascara for a dramatic. Doritos-inspired smokey eye that is perfect for a night out.

In conclusion, the beauty industry is constantly evolving, and the rise of unconventional beauty trends like Doritos eye shadow demonstrates the endless possibilities for creativity and self-expression in makeup. Whether you’re a makeup enthusiast looking to try something new. Or a beauty lover curious about the latest trends. Embracing unconventional beauty practices can be a fun and exciting way to express your unique sense of style. So go ahead, unleash your boldness with Doritos eye shadow and show the world your creative spirit.

How to Apply Mac Eye Shadow: Mastering the Art of MAC

Introduction:

Eye shadow is one of the most versatile makeup products that can instantly transform your look. With the right techniques and tools, you can create endless eye-catching looks that range from natural to glamorous.

MAC Cosmetics Matte Eye Shadow Omega

Part 1: Prepping Your Eyes

Level 1: Understanding Different Eye Shapes

  • Every eye shape requires a different approach when it comes to applying eye shadow. Whether you have almond-shaped, hooded, or monolid eyes, it’s crucial to understand your eye shape to enhance and flatter your features.

Level 2: Prime Your Lids

  • Before applying eye shadow, it’s essential to prep your eyelids with a good eye primer. This step helps to create a smooth canvas, prevents creasing, and ensures that your eye shadow lasts all day.

Part 2: Choosing the Right Eye Shadow Palette

Level 1: Understanding MAC Eye Shadow Finishes

  • MAC offers a wide range of eye shadow finishes, including matte, satin, frost, velvet, and lustre. Each finish offers different levels of pigmentation and texture, allowing you to create various looks.

Level 2: Selecting Complementary Shades

  • When choosing an eye shadow palette, it’s essential to consider your skin tone and the look you want to achieve. Whether you prefer neutral, warm, or bold colors, MAC offers an extensive range of eye shadow palettes to cater to your preferences.

Part 3: Basic Eye Shadow Application Techniques

Level 1: Using the Right Brushes

  • Investing in high-quality eye shadow brushes is crucial for achieving a flawless application. Different brushes are designed for specific purposes, such as blending, packing on color, and creating precise lines.

Level 2: Building and Blending Colors

  • Building and blending eye shadow colors is essential for creating a seamless transition and depth. Start with a transition shade, then gradually layer darker shades to create dimension and definition.

Part 4: Advanced Eye Shadow Techniques

Level 1: Creating Cut Crease

  • The cut crease technique involves defining the crease of your eye with a contrasting color, resulting in a sharp and defined look. This technique requires precision and blending to achieve a seamless finish.

Level 2: Applying Shimmer and Glitter

  • Shimmer and glitter eye shadows can add a touch of glamour to your look. To prevent fallout, use a damp brush or your fingertips to apply these textures, and consider using a glitter adhesive for a long-lasting effect.

Part 5: Perfecting Your Eye Makeup Look

Level 1: Adding Depth with Smoky Eyes

  • Mastering the art of smoky eyes involves blending dark colors to create a sultry and smoldering effect. This timeless technique can enhance the shape of your eyes and add drama to any look.

Level 2: Finishing Touches

  • Complete your eye makeup look with eyeliner, mascara, and false lashes to enhance your eye shadow and frame your eyes. Use a black or brown eyeliner to define your lash line and add volume and length with mascara or false lashes.

how to apply mac eye shadow

Part 6: Blending Techniques for Mac Eye Shadow Application

To achieve a seamless and professional eye makeup look with Mac eye shadow, mastering blending techniques is essential. One popular technique is the windshield wiper motion, where you sweep your brush back and forth in a windshield wiper motion along the crease of your eyelid. This helps to blend different shades together and create a smooth transition between colors. Another technique is called the circular motion, where you gently blend the edges of the eyeshadow in small circular motions to soften any harsh lines. This technique is great for creating a diffused and blended look. Lastly, the pat and blend method involves patting the eyeshadow onto your lid and then using a clean blending brush to softly blend out the edges. This helps to build up color intensity while maintaining a seamless finish.

When blending multiple Mac eye shadow shades together, start with a lighter shade as a base and gradually build up depth with darker colors. Use a clean blending brush in between each transition to ensure a smooth and well-blended result. It’s important to blend with a light hand and take your time to achieve the desired effect. Experiment with different blending techniques to find what works best for your eye shape and the look you want to achieve.

By mastering blending techniques, you can elevate your Mac eye shadow application and create professional-looking eye makeup looks with ease.

Part 7: Applying Mac Eye Shadow for Different Eye Shapes

When it comes to applying Mac eye shadow, it’s important to consider your eye shape to enhance and flatter your natural features. For hooded eyes, focus on creating depth and dimension on the visible lid space by using a combination of matte and shimmer shades. Avoid placing dark eyeshadow on the hooded area, as it can make the eyes appear smaller. For monolid eyes, create the illusion of depth by blending darker shades on the outer corner and lighter shades on the inner corner. Shimmer shades can be used to accentuate the center of the lid for a pop of brightness.

For deep-set eyes, use a light, matte shade on the brow bone to bring it forward and make the eyes appear more open. Focus darker shades on the outer corner and avoid placing too much dark eyeshadow on the lid. Protruding eyes can benefit from applying a darker shade on the outer corner and blending it into the crease to minimize the appearance of protrusion. Almond-shaped eyes can pull off most eyeshadow looks, but elongating the eyes with a winged eyeshadow shape can be particularly flattering.

Understanding your eye shape and applying Mac eye shadow accordingly can help accentuate your unique features and create stunning eye makeup looks.

MAC Eyeshadow - Shroom

Part 8: Tips for Creating Smokey Eye Looks with Mac Eye Shadow

Creating a classic smokey eye look with Mac eye shadow can be achieved with a few simple steps. Start by prepping the eyelids with an eyeshadow primer to ensure the eyeshadow stays in place and appears vibrant. Next, apply a neutral matte shade all over the lid as a base. Then, using a denser brush, apply a dark shade (such as black, charcoal, or deep brown) to the outer corner of the eye and blend it into the crease. Layer the dark shade gradually to build up intensity, ensuring the edges are well blended.

For added dimension, use a slightly lighter shade in the center of the lid and blend it into the darker shades. To intensify the look, use a black eyeshadow or eyeliner to line the upper and lower lash lines, smudging it out for a smoldering effect. Finish the look with several coats of mascara to add drama to the eyes.

When creating a smokey eye look, it’s important to blend thoroughly to avoid any harsh lines and create a seamless gradient of color. Utilize a clean blending brush to soften any edges and create a flawless finish. Remember to start with a small amount of product and gradually build up intensity to avoid overwhelming the eyes.

With these tips, you can effortlessly create a stunning smokey eye look using Mac eye shadow for any occasion.

Conclusion:

Mastering the art of applying MAC eye shadow requires practice, patience, and experimentation. By understanding your eye shape, choosing the right palette, and mastering various techniques, you can create stunning eye makeup looks that reflect your style and personality. With the right tools and knowledge, you can unleash your creativity and achieve professional-level eye makeup results.